Behavioral setup design
Current protocol is performed with the use of two different systems (shown in the picture below). The one on the right was purchased through Labeotech, and the one on the left manufactured in-house using mostly the parts from ThorLabs. The list of materials can be found in the source table in the repository. It should be noted that the first system is designed for the head fixation using the small titanium bars affixed to the skull, while the second is fitted for the use of headplates, which gives more flexibility in implant design. The second system is easily regulated in height and also can be used for different tasks beyound reaching (ex. rotarod).

The system consists of three principal components:
- Head fixation device with a plastic tube, housing the mouse during the experiment;
- Motorized water delivery system - linear actuator syringe pump and an XY moving stage with a blunt needle;
- Arduino-based controller performing the programmed experimental protocol (written in C++), interfacing with the touch sensors in the box and providing the master clock signal
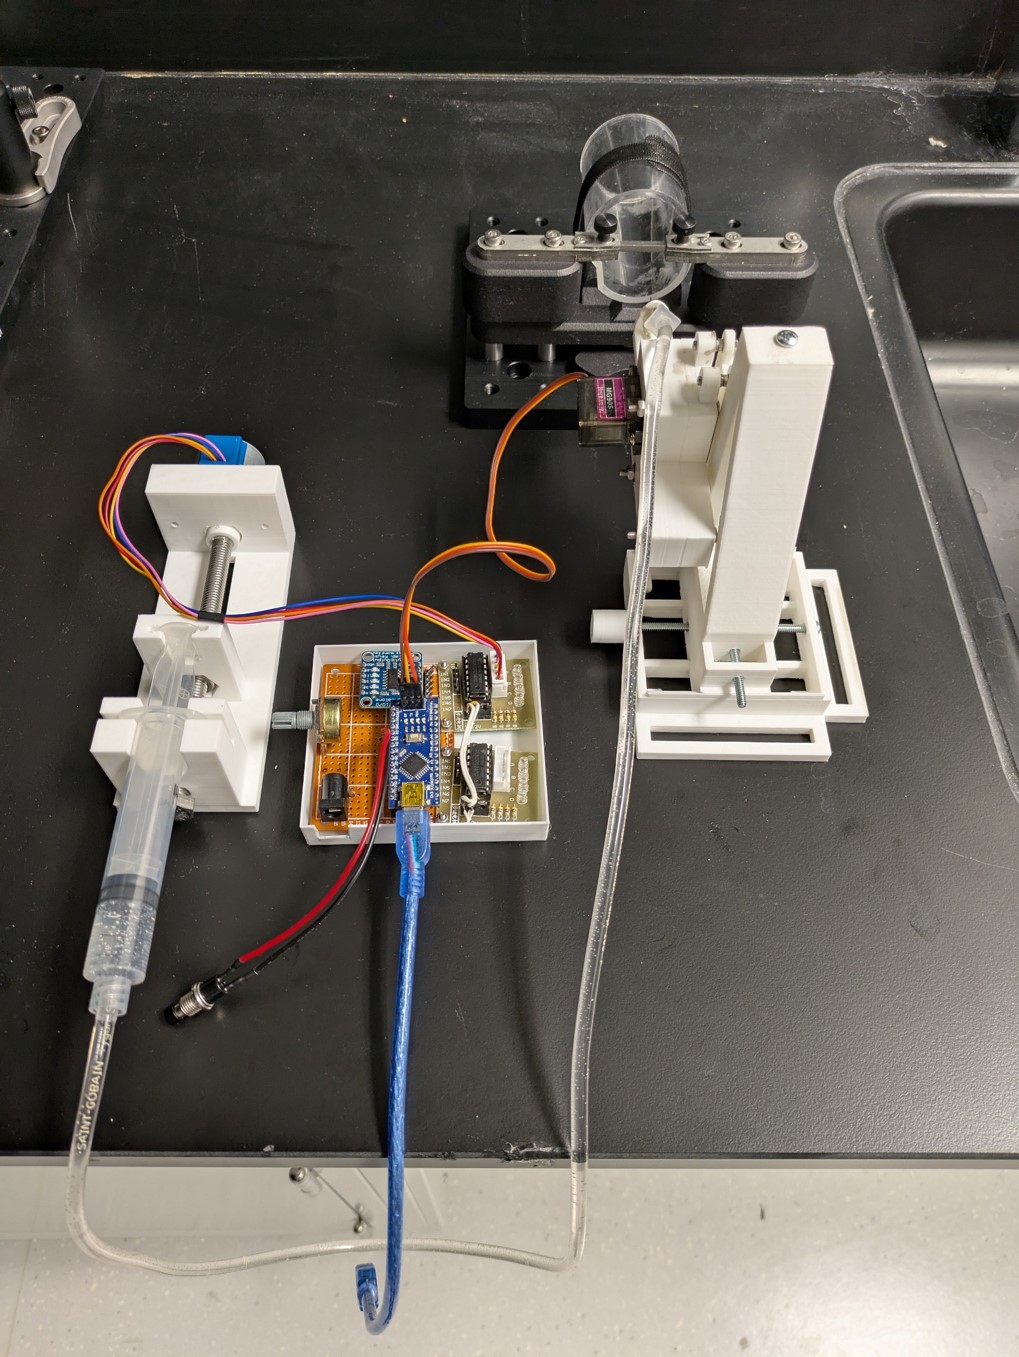 The view of the whole system with actuator, water delivery and the controller schematic
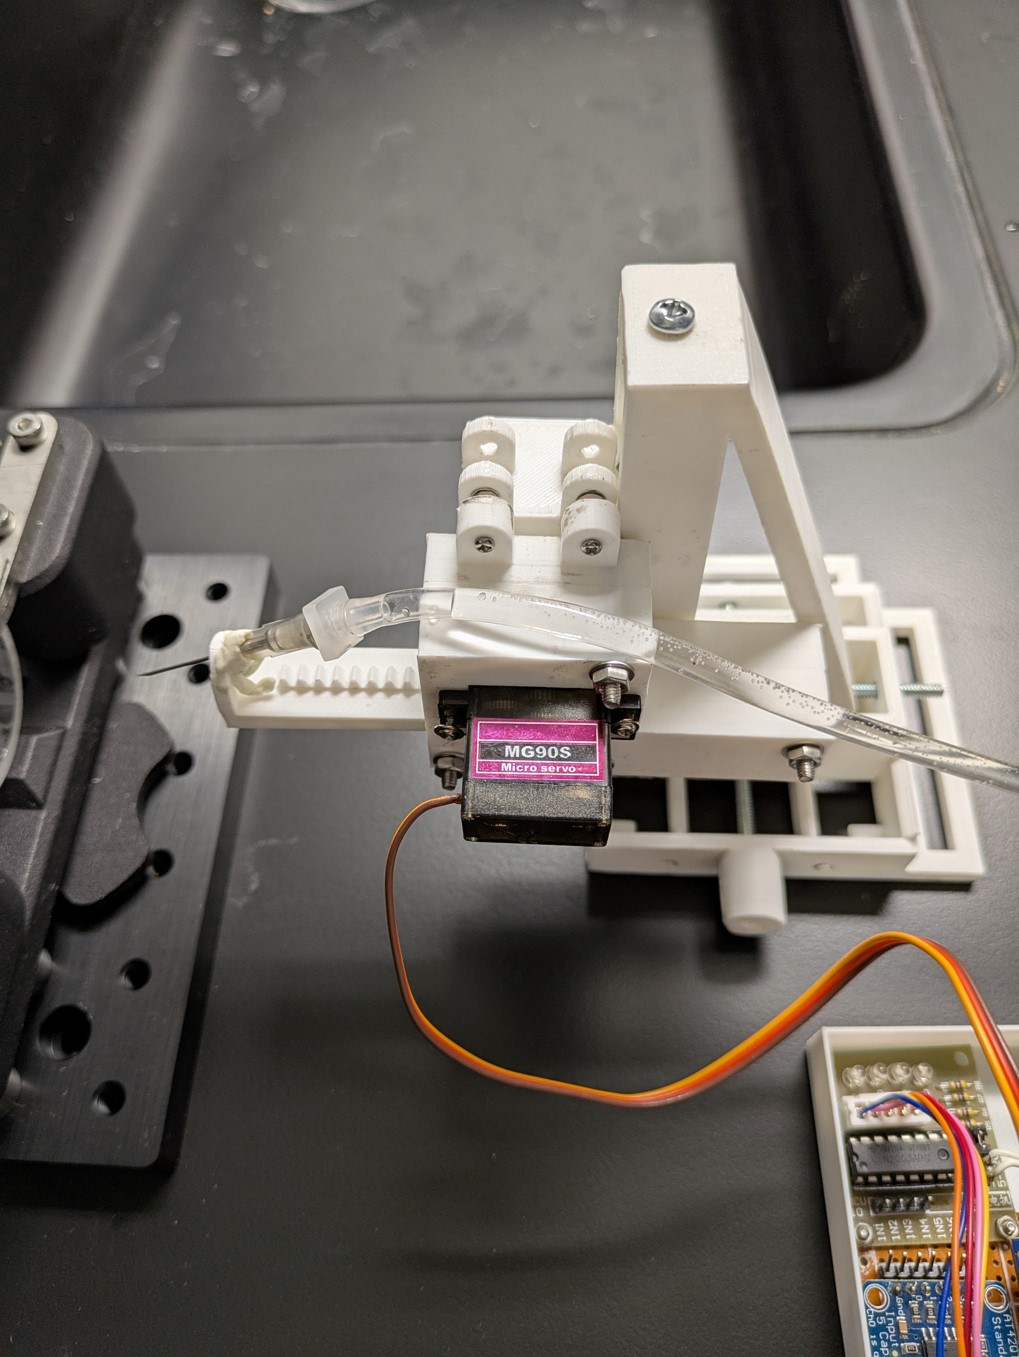 Close-up on the water delivery tip on the XY actuator
The whole water delivery system is 3D printed .stl files for printing the plastic components are provided in this folder of the repository. You will also need long M2 screws and nuts to fabricated the metal shafts for XY actuator and M5 screw for the water pump actuator (as a “rail” to move the syringe plunger).
Assembly
The custom system is assembled on the optical posts from Thorlabs, which are mounted on the solid heavy base. Two rods mounted perpendicularly are used for holding the head and are fitted with 3D printed holders for headplates. The design for both headplates and the holders can be found in that folder of the repository. While holders are 3D printed and simply screwed on the pin of the optical post, to manufacture the headplates you will need a laser cutter. If you don’t have one you can simply upload the models to one of the online cutting services like SendCutSend.
The electrical part of the device is largely overlapping with the original ReachOut project (see schematic in the “Hardware part”) and is based on the Arduino Nano with two main periferal boards from Adafruit:
- ULN2003 board to control a small BYJ48 stepper motor in the syringe pump
- AT42QT1070 board connected to the blunted syringe needle to detect touches
Optional: there is also an optional actuator for the syringe needle which is motorized using MG90S servo motor directly connected to Arduino (zoom the picture above for more details).
Code
As the heart of our training setup is the water delivery system, and it is controlled by Arduino, all the protocols are framed as different programs that can be uploaded on the device. Those protocols can be found in code folder of the repository:
- HeadFixed_Program
- HeadFixed_Program_Auto
- HeadFixed_Program_Manual
There is also some code that can be used if you try to build a headfixed rotarod (based on the rotary encoder with Arduino) with this setup.